Set up your first Inbox
An Inbox is the primary operational unit for receiving and routing customer conversations.
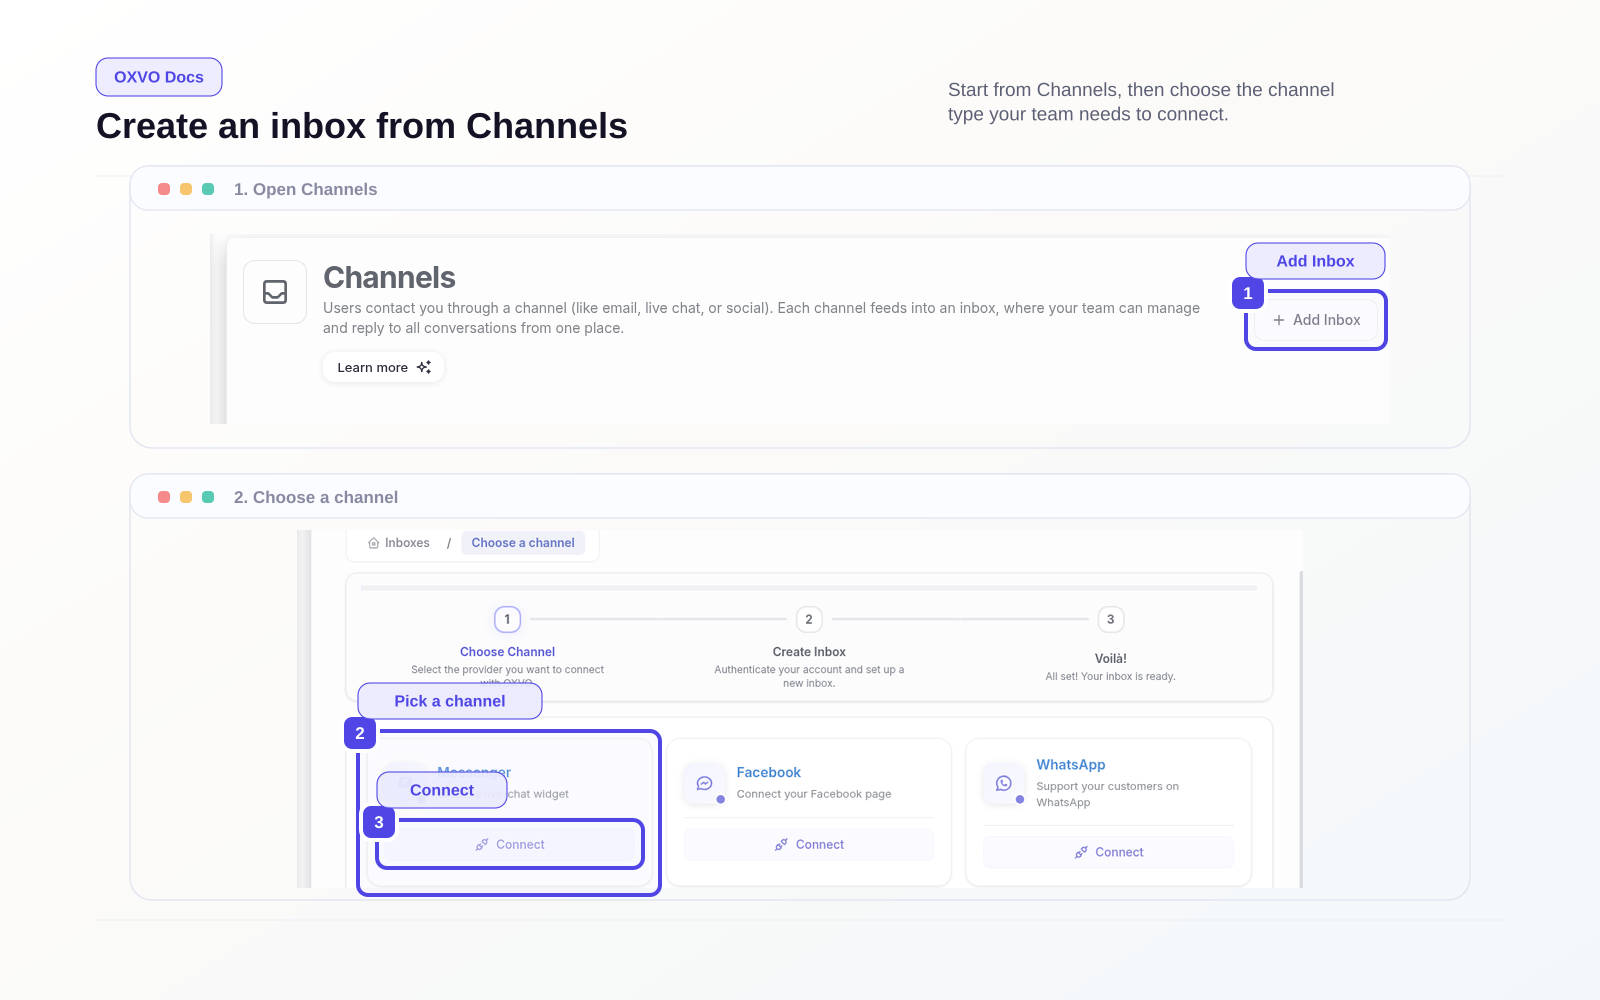
Choose a channel and create your first Inbox
From Settings → Channels, select Add Inbox, then choose one channel:
- Messenger for the website live-chat widget
- API
- Social and messaging channels such as Facebook, WhatsApp, Instagram, Telegram, Line, and SMS
Open directly: Open Channels
Complete channel configuration
- Select the channel card.
- Select Connect.
- Enter channel credentials or authorization details.
- Name the inbox clearly (for example,
Support - USorBilling). - Add initial agents.
- Finish the wizard and open the inbox settings page.
Start new channel setup: Open New Channel Setup
Apply Inbox basics
In the inbox settings tabs, configure:
- Business hours
- Greeting and out-of-office behavior
- Pre-chat form (for web widget)
- CSAT (if enabled)
- Installation snippet (for web widget)
Verify your first Inbox end-to-end
- Send a test message through the connected channel.
- Confirm the conversation appears in the inbox view.
- Assign it to an agent and resolve it.
Open inbox settings: Open Inbox Settings
Warning: Do not enable broad automation rules until at least one inbox has been tested manually. This avoids accidental routing loops.